The past month I’ve been cooking in two unfamiliar kitchens, the first being the San Francisco bachelor/bachelorette pad shared by several friends of my daughter and the second the “camp” belonging to my wife in the Adirondacks.
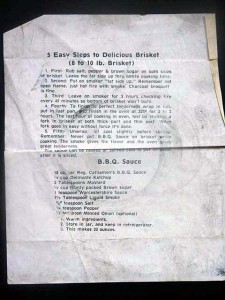
In San Francisco, my task was to prepare a Texas brisket meal for 60 people for the wedding party. I knew what I was in for and brought a number of key components with me, including my chef’s knife, a stack of aluminum trays and several necessary spices. But there were some things too big to carry on the plane, like the brisket itself and hickory chunks for the smoker (my old one from Phillip Claypool, which had been kindly stored in the back yard of the same SF flat). Chunks were hard since not only are San Franciscans not known for their smoking but in fact there is a city ordinance against open fires; finally I found a small expensive bag at Action Rentals, which also rents cooking equipment.
Brisket, on the other hand, was a major score. Cash & Carry, a restaurant wholesaler, had USDA Choice for $1.57 a pound… a lower price than I’ve ever seen in Texas. They also had an enormous bag of shredded cabbage at the same per-pound price I’d paid for the 10 pounds I’d just shredded myself to make sour slaw, so I added that to the hand truck. I stood in line with several other happy guys sharing hints (but no trade secrets) for what we were going to do with our brisket.
I was prepared for challenges in the prep, just didn’t know what they would be. The beans (to be used for Jack Daniels style baked beans eventually) were precooked in another alien location, the galley kitchen of the “home away” where I was staying with my boys; I used every pot and pan in the place. Back at the flat, the cookspace turned out to be tiny and without a cutting surface so I went out and bought a cutting board, the only outright cookware purchase I made. And I had too many briskets to fit in the smoker so I had to cook them in two batches, making for a 10 am to midnight cooking day. Fortunately the apartment dwellers were away at the formal pre-wedding ball where I was supposed to be; I put in an appearance then scurried back to tend my brisket and I knew the culinary gods were smiling when I was able to carry four trays of dripping brisket down three flights of stairs to my car parked in the towaway zone without spilling anything on my fancy duds.
The meal turned out just like it was supposed to, served the next night to hungry people at a conference center in the redwoods who kept coming back for seconds, which I was happy to be able to offer them. One half a brisket made it through the night and for the rest of the weekend whenever you went into the kitchen at the center (which hadn’t been available to me for prep) you’d see somebody surreptitiously sneaking a scrap out of the fridge. Among them were the renowned caterers who prepared the next night’s wedding feast, high praise indeed.

